First-Run Setup
After starting Houndarr for the first time, follow these steps to get it configured.
1. Create an admin account
Navigate to http://<your-host>:8877. You will see the setup screen prompting you
to create an admin username and password.
- Choose a strong password (Houndarr enforces minimum complexity requirements).
- This is the only account. Houndarr uses a single-admin authentication model.
2. Log in
After creating your account, log in with your new credentials. The Dashboard greets you with an empty-state panel until you add your first instance:
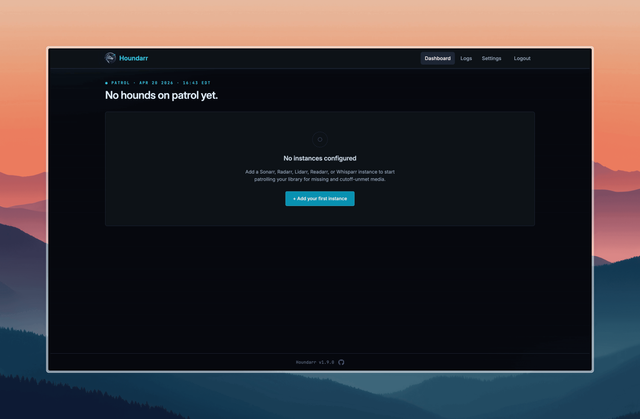
Click Add your first instance or open the Settings link in the top nav to continue.
3. Add your instances
Go to Settings and click Add Instance to connect your *arr instances.
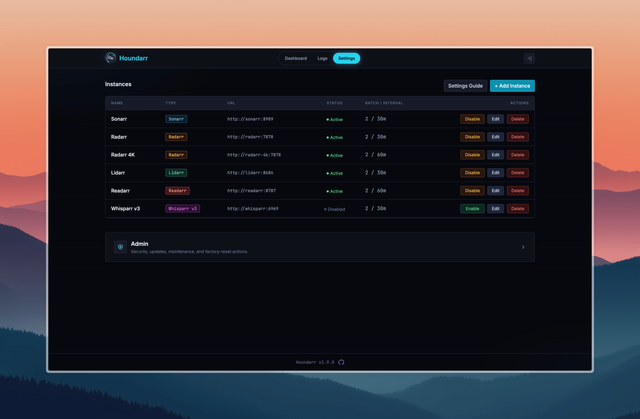
For each instance you need:
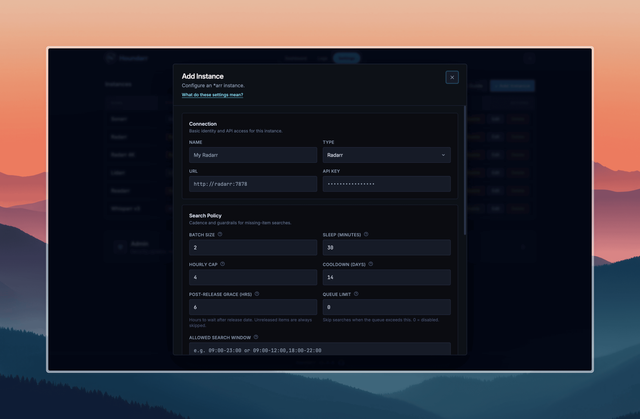
- Name: a friendly label (e.g., "Radarr Movies", "Sonarr 4K", "Lidarr Music")
- Type: Radarr, Sonarr, Lidarr, Readarr, Whisparr v2, or Whisparr v3
- URL: the base URL of the instance (e.g.,
http://sonarr:8989). For Docker Compose, this must be the *arr's internal container port, not the host port you published. See Troubleshoot Connection if the connection test fails. - API Key: found in your *arr instance under Settings > General
API keys are encrypted at rest using Fernet symmetric encryption and are never sent back to the browser. See Credential Handling for details.
4. Configure search settings
Each instance has its own search settings. The defaults are tuned to stay well under typical indexer limits:
| Setting | Default | Purpose |
|---|---|---|
| Batch Size | 2 | Items per search cycle |
| Sleep (minutes) | 30 | Wait between cycles |
| Hourly Cap | 4 | Max searches per hour |
| Cooldown (days) | 14 | Min days before re-searching an item |
| Post-Release Grace (hrs) | 6 | Hours to wait after release date before searching |
| Hot Retry Window (hrs) | 0 (disabled) | Optional short retry window after post-release grace |
| Hot Retry Interval (hrs) | 2 | Hours between hot retries while the window is active |
| Queue Limit | 0 (disabled) | Skip cycle when download queue meets or exceeds this count |
For detailed explanations of all settings, see Instance Settings.
5. Enable the instance
Toggle the instance to Enabled in the Settings page. Houndarr will begin searching on the configured schedule.
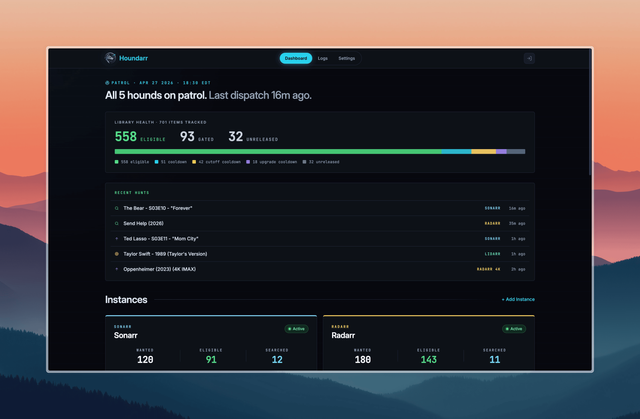
The Dashboard
Once instances are enabled, the Dashboard has two sections.
Library health
The top section shows:
- An adaptive subheader with an N of M hounds on patrol sentence and the most recent dispatch timestamp
- A library-health bar with five gating segments (eligible, cooldown, cutoff cooldown, upgrade cooldown, unreleased) summed across every configured instance
- A Recent hunts strip listing the last 5 dispatches in the past 7 days, each in its instance's type color
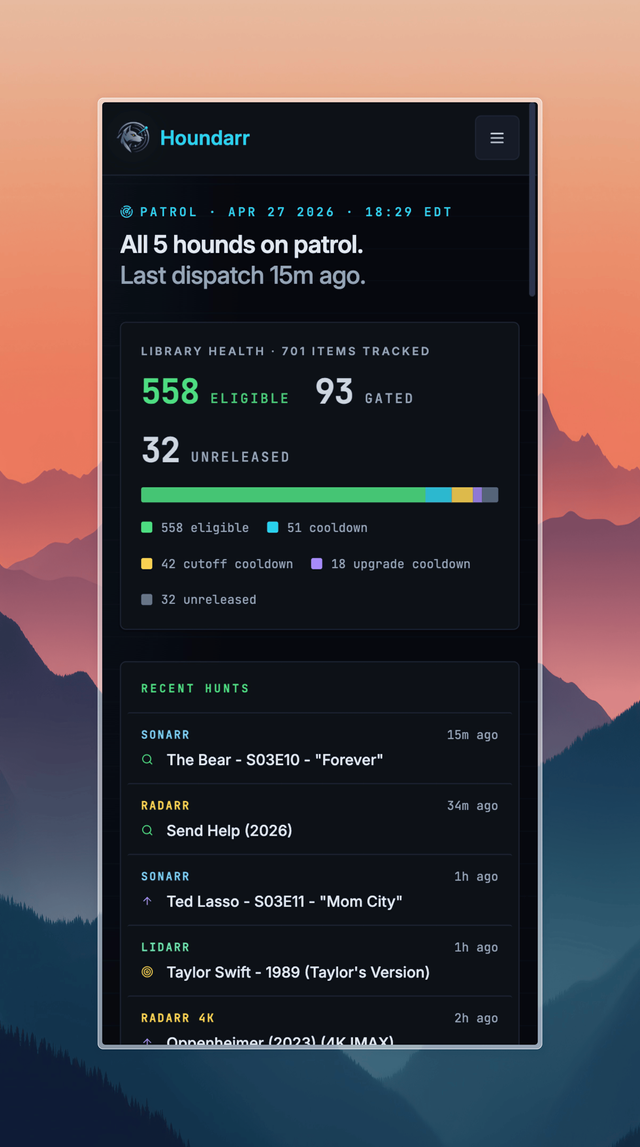
Same section on a phone-width viewport; the Recent hunts strip sits as a scrollable list under the gating bar.
Instances
The lower section lays out one card per instance with:
- A type eyebrow, instance name, and a 3-stat row (
WANTEDmonitored total,ELIGIBLEready-to-search count, andSEARCHEDlifetime dispatches) - A Cooldown schedule inset panel showing the soonest, median, and latest items to unlock, each with title and time-until-unlock
- A policy chip row with tooltips, and a type-colored Run Now outline button
- An error banner and a red
N errorspill on any card whose latestsearch_logrow is an error; both deep-link to the Logs page filtered to that instance - A disabled-card treatment (dim border, muted stats,
pausedfooter, disabled Run Now) for any instance withenabled=0
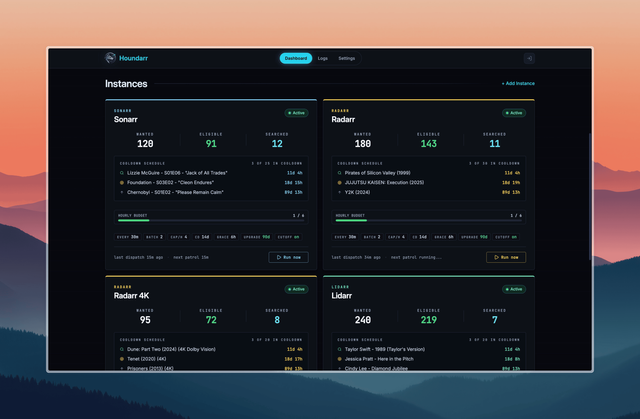
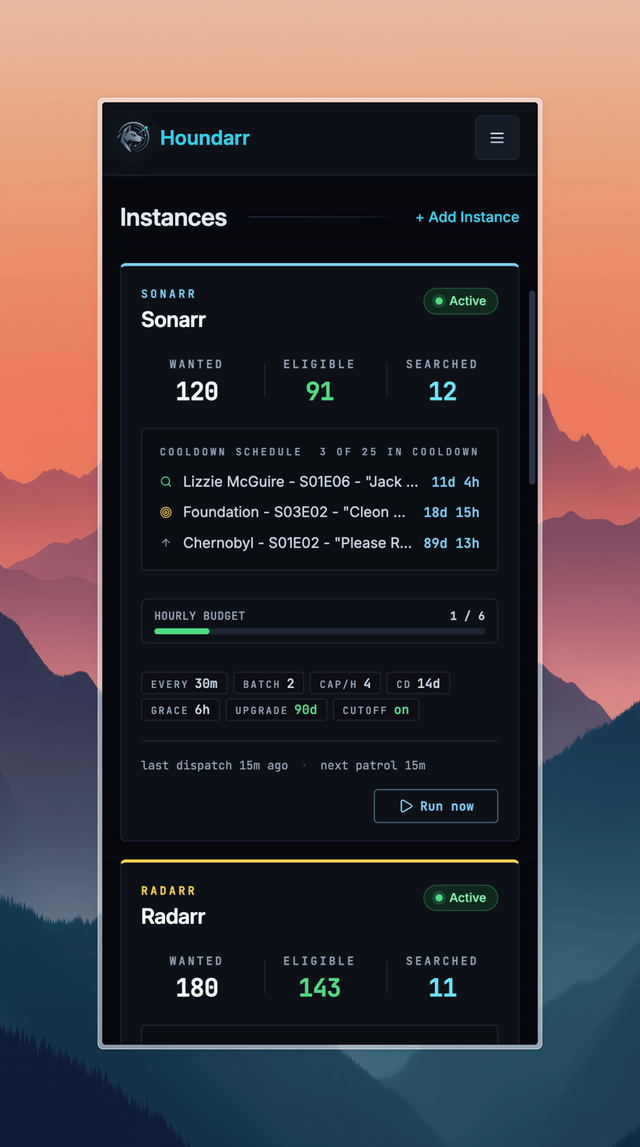
Same layout on a phone-width viewport; cards stack into a single column.